Building a Cosmos App Frontend with create-cosmos-app and Keplr Wallet Integration


In this tutorial, we’ll walk through the process of creating a frontend for decentralized apps (dapps) that connect to the Keplr Wallet. We’ll achieve this using the create-cosmos-app tool, which brings together CosmosKit, Nextjs, Telescope, and Chakra UI, providing an easy way to start building dapps with all the necessary dependencies bundled up for you.
What you will get from this Article
How to install Node.js
How to install the Keplr Wallet extension
How to install Yarn globally using npm
How to use the
create-cosmos-apptool to create a frontend that can connect to multiple chainsLinks to valuable resources related to
create-cosmos-app
Prerequisites
Before we get started, ensure you have Node.js installed, because we will use Node package manager(npm) to run our commands. You can download it from https://nodejs.org/en and follow the installation instructions. After installation, you can verify it by running the command node -v in your command prompt (cmd).
node -v

Congratulations you have successfully installed Node.js!
Creating a Cosmos App with create-cosmos-app
What is create-cosmos-app (CCA)
CCA is a tooling used to create frontend Decentralize apps (dapps) that connect to Keplr wallet and can also be used to interact with smart contracts.
First, we need to install create-cosmos-app globally by running the following command in your terminal:npm install -g create-cosmos-app
Next, create your dapp by executing the create-cosmos-app command and providing a name for your app:create-cosmos-app
connect-chainbuilds the dapp that defaults to one chain.connect-multi-chainbuilds the dapp with miltiple chain.
Before running any Yarn commands,
you need to install Yarn globally using npm: npm install --global yarn
You can check if Yarn has been installed successfully by running yarn -v in your terminal.

Start the server for your project with the following commands:cd ./<the name of your app> && yarn dev
For example, if your app is named “my-app,” the command would be:cd my-app && yarn dev
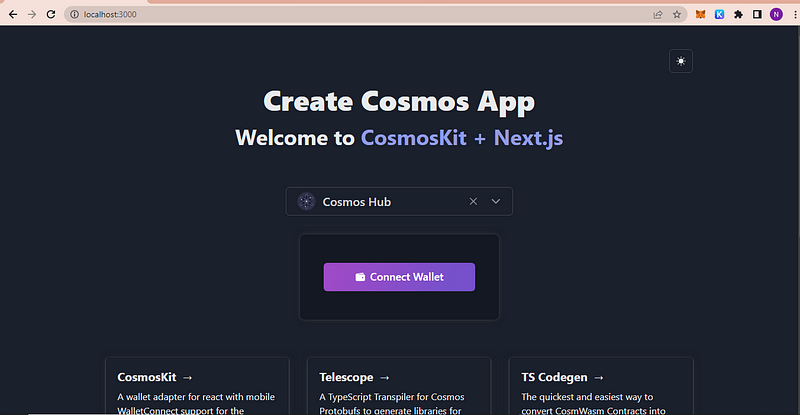
Your project will now be running at http://localhost:3000/.
You have successfully started your Project!
Installing Keplr Wallet
To interact with your dapp, you’ll need the Keplr Wallet extension. If you’re using Chrome or Microsoft Edge, you can download it from the Chrome Web Store: https://chrome.google.com/webstore/detail/keplr/dmkamcknogkgcdfhhbddcghachkejeap.
Alternatively, visit the official Keplr website for downloads compatible with other browsers: https://www.keplr.app/download.
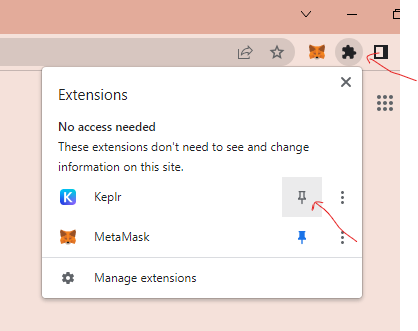
After installing the Keplr Wallet extension, click on the puzzle icon at the top right of your Chrome browser and pin Keplr Wallet for easy access.
Creating and Securing Your Keplr Wallet
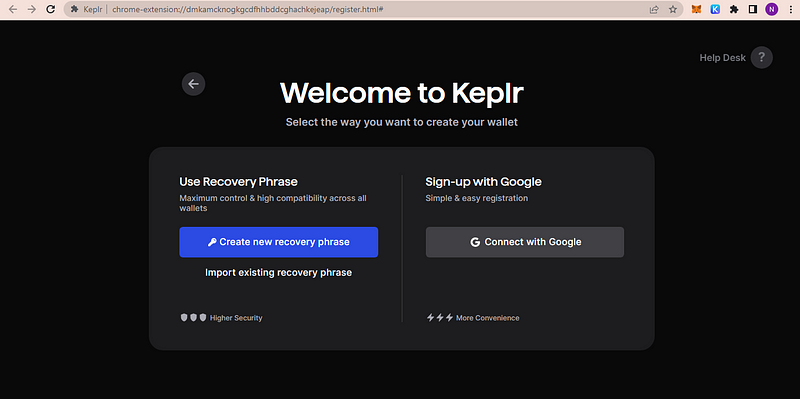
Open a new tab and click on the pinned Keplr Wallet. Choose the option to “Create a new wallet.”

After clicking “Create a new Wallet” we’ll have a screen like this:
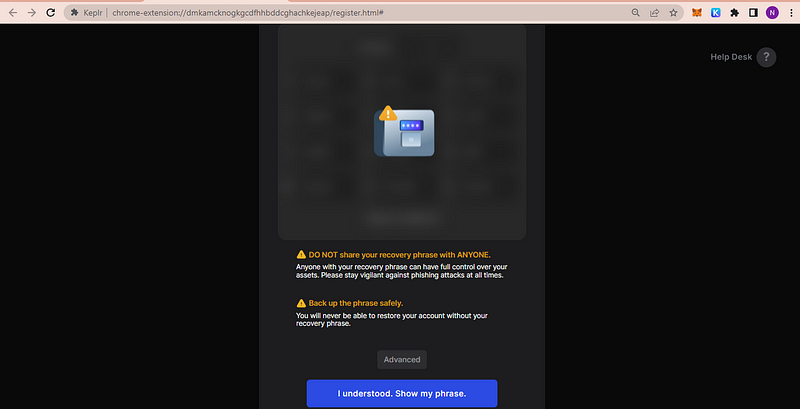
Choose the option to “Create new recovery phrase”
Remember to carefully read and understand the warning messages. It is crucial to keep your recovery phrase safe and not share it with anyone, as it grants full control over your assets.
After clicking “I understand show my phrase,” you’ll be given the option to choose between a 12-word and 24-word recovery phrase. Select 24 words for enhanced security.
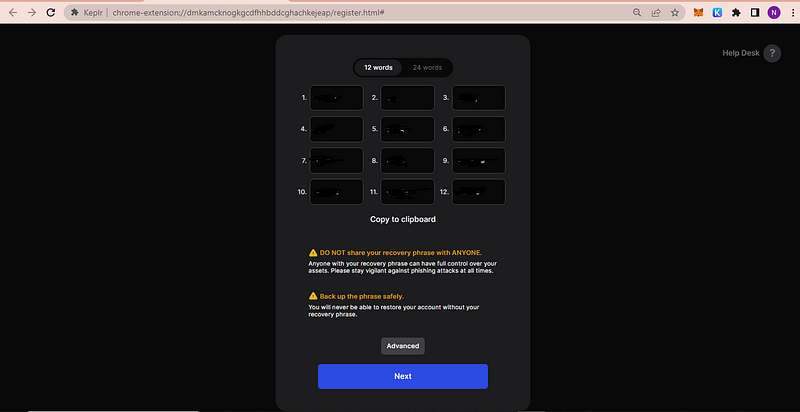
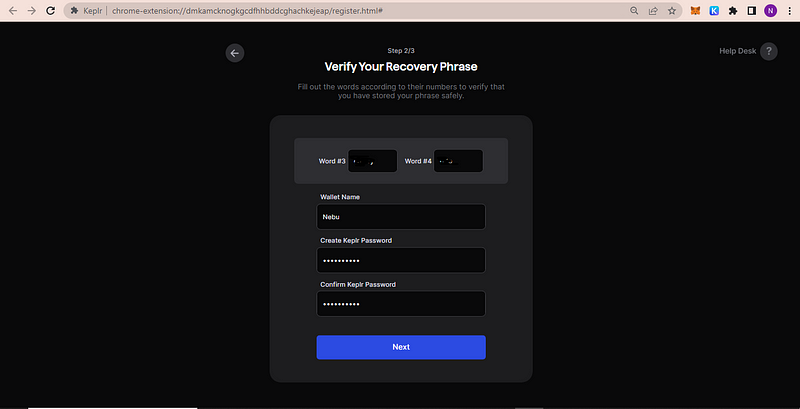
Copy and save your recovery phrase in a secure location. You will not be able to restore your account without it. Fill out the required inputs correctly, including two words from your recovery phrase, wallet name, and a strong password.
then click “Next”
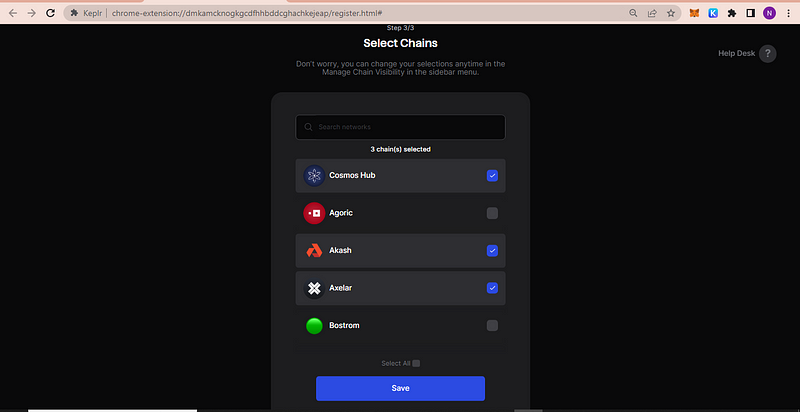
Select as many chains as you want, scroll down to see more chains, and also search for chains.
then click “save”
you will be directed to this section once you have successfully created your account:
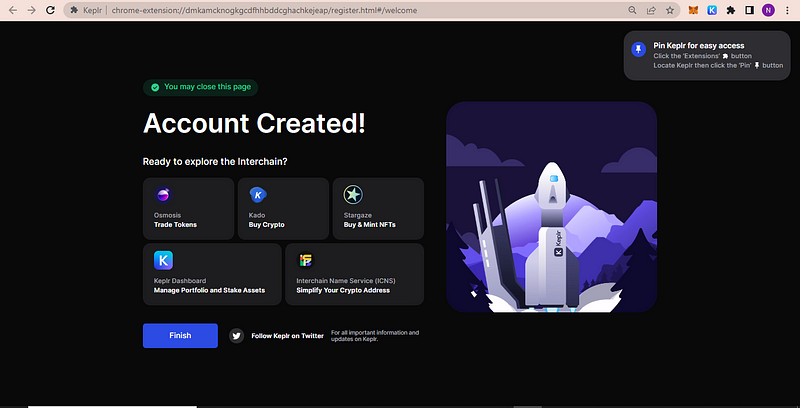
You have successfully Installed Keplr Wallet
Integrating Keplr and Your Dapp
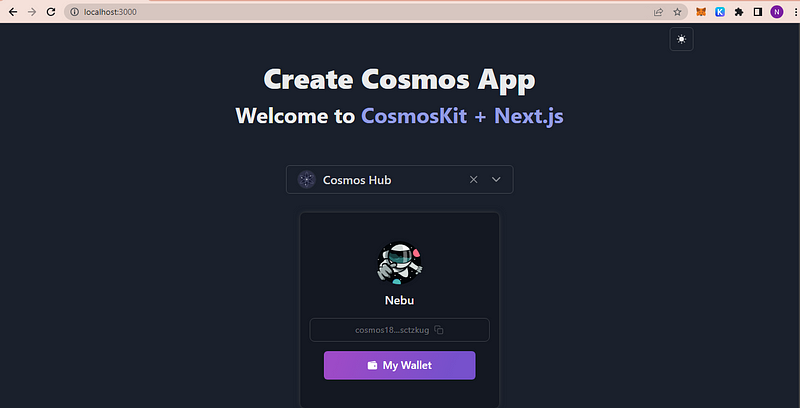
Now, return to your dapp running at http://localhost:3000/ and click the “Connect Wallet” button.
By default, the Cosmos App is connected to the Cosmos Hub chain. You can select any other chain you want and click “Connect Wallet.”
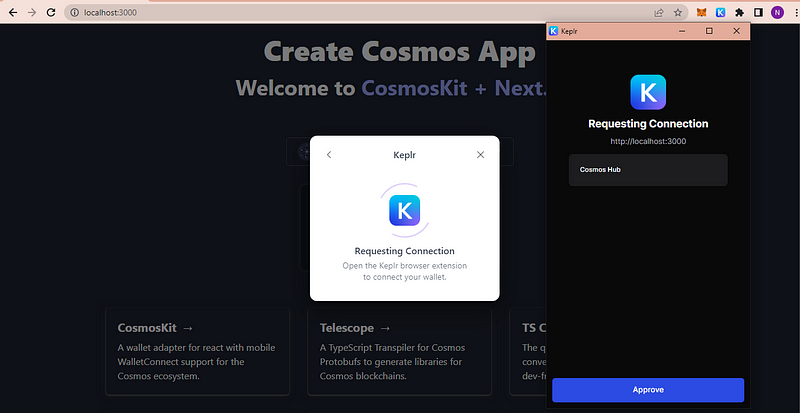
If everything goes well, you’ll see your Cosmos App connected to Keplr Wallet.
Useful Resources
Here are some valuable resources to learn more about create-cosmos-app and related libraries:
CosmosKit: For wallet Connections
Telescope: For working with Software development kit (SDK) messages
Ts Codegen: For converting your smart contracts into Typescript
Cosmwasm Academy: To learn about Cosmwasm smart contracts
Chain Registry: Involves all Chains connect to Cosmos App
Cosmology Tech Website: Links to the Official Cosmology website
Chakra Ui: This has a lot of prebuilt components
NextJs: For static and server-side rendering
Create-cosmos-app GitHub repo
Conclusion
Congratulations! You have successfully built a Cosmos App frontend using the create-cosmos-app tool and integrated it with the Keplr Wallet to connect to various chains in the Cosmos ecosystem. Keep exploring and building within the Cosmos ecosystem!
Feel free to reach out to me on Twitter if you have any questions or encounter any issues during the process. Additionally, you can join the Cudos Discord community for further support.